Angelscript Test Support🔗
Angelscript features a xUnit-style unit testing framework. There is also an
integration test framework that can play back game scenarios and wait for
some condition to occur. You can generate code coverage reports for test
runs as well. FName
Unit Tests🔗
void Test_NameOfTheTestCase(FUnitTest& T)
{
// Fails the test.
T.AssertTrue(false);
T.AssertEquals(1, 1 + 1);
T.AssertNotNull(nullptr);
}
You can put test code in any Angelscript file, but by convention these
are put in File_Test.as if your production code is in File.as.
Running Unit Tests🔗
Unit tests run on hot reload, so to run a test you just create a test like
above, open the Unreal editor, and save the file. In Unreal, go
Window > Developer Tools > Output Log and you will see lines like
Angelscript: [RUN]    Some.Angelscript.Subdir.Test_LaunchesNukesWhenCodesAreEntered
...
Angelscript: [OK]     Some.Angelscript.Subdir.Test_LaunchesNukesWhenCodesAreEntered (0.2530 ms)
Furthermore, the tests show up under the category "Angelscript" in the Test Automation tool.
You will need to install that one into Unreal. See https://docs.unrealengine.com/en-US/Programming/Automation/UserGuide/index.html
You can also run tests from the command line:
Engine\Binaries\Win64\UE4Editor-Cmd.exe \Path\To\your.uproject -NullRHI -NoSound -NoSplash -ExecCmds="Automation RunTests Angelscript.UnitTests" -TestExit "Automation Test Queue Empty+Found 0 Automation Tests, based on" -unattended -stdout -as-exit-on-error
Installing a Custom Game Mode for Unit Tests🔗
You can add this line to one of your .ini files in your project to get a game mode in your tests:
You can then create a blueprint at the specified location and put whatever settings you want in there.
This will be used by all unit tests.
[/Script/EngineSettings.GameMapsSettings]
...
+GameModeClassAliases=(Name="UnitTest",GameMode="/Game/Testing/UnitTest/BP_UnitTestGameMode.BP_UnitTestGameMode_C")
Integration Tests🔗
Integration tests are for testing larger or longer code-flows and gameplay.
By default, each integration test has a map where you can draw up any geometry or place any actors you like.
Add this to for instance MyTestName_IntegrationTest.as:
void IntegrationTest_MyTestName(FIntegrationTest& T)
{
}
Then you need to add a test map IntegrationTest_MyTestName.umap to /Content/Testing/ (create the dir if you don't have it
in your project yet). The map name is always the same as the test name, with .umap added.
You can also configure the integration test map dir with this setting in your .ini files:
[/Script/AngelscriptCode.AngelscriptTestSettings]
IntegrationTestMapRoot=/Game/Testing/
If you would like to use a different map for an integration test, or the same map for multiple tests (e.g. testing in your existing level .umap files), create a second function with the format FString IntegrationTest_MyTestName_GetMapName() and return the full path to the map. This is something like /Game/YourProject/YourMap. You can right click the map and copy the reference to see it.
FString IntegrationTest_MyTestName_GetMapName()
{
return "/Game/YourProject/Maps/YourMap";
}
Note: changing levels isn't supported at the moment, it breaks the GameWorld context passed to the FAngelscriptContext that the angelscript code is being executed within.
You can retrieve placed actors like this (or spawn them in the test):
// Looks up an actor in the map
AActor GetActorByLabel(UClass Class, const FName& Label)
{
#if EDITOR
TArray<AActor> Actors;
GetAllActorsOfClass(Class, Actors);
for (AActor Actor: Actors)
{
if (Actor.GetActorLabel() == Label)
{
return Actor;
}
}
FString AllActorLabels = "";
for (AActor Actor: Actors)
{
AllActorLabels += "- " + Actor.GetActorLabel() + "\n";
}
if (AllActorLabels.IsEmpty())
{
Throw(
"Did not find an actor with class " + Class.GetName() +
" and label " + Label + ". In fact, there no actors in this level.");
}
else
{
Throw(
"Did not find an actor with class " + Class.GetName() +
" and label " + Label + ". Found these actors:\n" + AllActorLabels);
}
#endif // EDITOR
Throw("GetActorByLabel is only for testing, i.e. when in EDITOR mode.");
return nullptr;
}
Latent Automation Commands🔗
The code in the test function executes before the map is loaded and before the first frame executes. The test is not complete when the test function returns therefore, it has merely enqueued a series of latent automation commands (Unreal documentation). If we assume the test enqueues no latent commands of its own (like the one above), the test framework will enqueue the following actions (see IntegrationTest.cpp):
- FWaitForMapToLoadCommand()
- FEnsureWorldLoaded()
- FExitGameCommand()
- FReportFinished()
- FFreeTest()
These execute in sequence. Each action can take multiple engine frames to execute.
The test can enqueue latent commands of its own:
void IntegrationTest_AlienShootsRepeatedly(FIntegrationTest& T)
{
AActor A = GetActorByLabel(ABulletSponge::StaticClass(), n"BulletSponge");
ABulletSponge Floor = Cast<ABulletSponge>(A);
T.AddLatentAutomationCommand(UGetsShotXTimes(Floor, 2));
}
The action is enqueued using T.AddLatentAutomationCommand. The set of latent actions will now be:
- ...
- FEnsureWorldLoaded()
- UGetsShowXTimes()
- FExitGameCommand()
- ...
AddLatentAutomationCommand takes a ULatentAutomationCommand:
UCLASS()
class ABulletSponge : AStaticMeshActor
{
int NumTimesHit = 0;
UFUNCTION(BlueprintOverride)
void BeginPlay()
{
OnTakeAnyDamage.AddUFunction(this, n"TakeAnyDamage");
}
UFUNCTION()
private void TakeAnyDamage(AActor DamagedActor, float32 Damage, const UDamageType DamageType, AController InstigatedBy, AActor DamageCauser)
{
NumTimesHit++;
}
}
class UGetsShotXTimes : ULatentAutomationCommand
{
private ABulletSponge BulletSponge;
private int ExpectedNumHits;
UGetsShotXTimes(ABulletSponge Target, int X)
{
BulletSponge = Target;
ExpectedNumHits = X;
}
UFUNCTION(BlueprintOverride)
bool Update()
{
// Note: actors can get DestroyActor'd at any time, so fail nicely if that happens!
ensure(IsValid(BulletSponge));
return BulletSponge.NumTimesHit > ExpectedNumHits;
}
UFUNCTION(BlueprintOverride)
FString Describe() const
{
return BulletSponge.GetPathName() + ": bullet sponge got hit " + BulletSponge.NumTimesHit + "/" + ExpectedNumHits;
}
}
The game engine will keep ticking as long as Update returns false. This means you can wait on any condition you can think of. The default timeout is five seconds though, so you can't wait for too long.
You can specify default bAllowTimeout = true on a latent command to allow it to time out. This is useful if you want to test that something is not happening
(e.g. check actor doesn't move out of bounds during 5 seconds).
Client/Server vs Standalone🔗
The default behaviour is to run the integration tests in a client/dedicated-server model. This will break some assumptions and code that singleplayer games use. To run it in standalone mode instead, disable Project Settings -> Angelscript Test Settings -> Use Client Server Model.
Running Integration Tests🔗
Integration tests don't run on hot reload like unit tests, so you need to invoke them through the Test Automation window in Unreal. They are run just like unit tests, see above.
To run integration tests from the command line, run the same line as for unit tests but replace Angelscript.UnitTests with Angelscript.IntegrationTests.
Complex Integration Tests🔗
You can also generate test cases dynamically:
void ComplexIntegrationTest_PotionsAreTooStrongForKnight_GetTests(TArray<FString>& OutTestCommands)
{
for (APotion Potion: MyGame::GetPotionRegistry().GetAllPotions())
{
OutTestCommands.Add(Potion.GetName().ToString());
}
}
void ComplexIntegrationTest_PotionsAreTooStrongForKnight(FIntegrationTest& T)
{
FString PotionName = T.GetParam();
APotion Potion = MyGame::GetPotionRegistry().LookupPotion(PotionName);
AKnight Knight = Cast<AKnight>(GetActorByLabel(AKnight::StaticClass(), n"Knight"));
AActor PotionSeller = GetActorByLabel(AActor::StaticClass(), n"PotionSeller");
// Order the knight to walk over to the potion seller and try to buy a potion.
Knight.BuyPotionFrom(PotionSeller, Potion);
T.AddLatentAutomationCommand(UExpectResponse("My potions are too strong for you traveller.", Knight, PotionSeller));
}
If we assume you have three potions in your potion registry, this generates three test cases:
Angelscript.IntegrationTest.Your.Path.ComplexIntegrationTest_PotionsAreTooStrongForKnight[DA_Potion1]
Angelscript.IntegrationTest.Your.Path.ComplexIntegrationTest_PotionsAreTooStrongForKnight[DA_Potion2]
Angelscript.IntegrationTest.Your.Path.ComplexIntegrationTest_PotionsAreTooStrongForKnight[DA_Potion3]
A Full Example🔗
/**
* An example of an integration test to test that saves are backwards compatible (via
* upgrades/migrations). This could be in a file called
* Testing/UpgradeSaveGame_IntegrationTest.as, or
* AnythingElse/DoesntMatter_IntegrationTest.as.
*
* Assume that we changed the protected variable that ExampleGameMode::GetCash() uses,
* between v1 and v2, and we want to ensure that our upgrade code (not shown)
* successfully copies it from the old variable to the new.
*
* Note that angelscript does a lot of lifting around turning the automation framework
* into integration tests. See the code for more details.
*
*/
// define the overall test. The naming standard is important. you run this from Session
// Frontend -> Automation Tab. Search for e.g. "V1" to show this function, then tick it
// to select it.
void IntegrationTest_UpgradeSaveGameV1(FIntegrationTest& T)
{
// queue the object that can run for more than one frame, to validate a long-running test
T.AddLatentAutomationCommand(UTestUpgradeSaveGameV1());
}
// A function that returns an FString, with the same name as the integration test + a
// _GetMapName() suffix allows us to override the default behaviour of requiring a map
// name matching the test name.
FString IntegrationTest_UpgradeSaveGameV1_GetMapName()
{
return "/Game/IS/Maps/ISMainMap";
}
// bulk of the work is here. You can have multiple of these
class UTestUpgradeSaveGameV1 : ULatentAutomationCommand
{
// the sentinal value we expect to see in the loaded save. in the v1 save this is
// stored in ExampleGameMode::Cash. In the v2 save, ExampleGameMode::GetCash()
// should be able to retrieve this from the new CashTest variable.
// different to what CashTest defaults to.
float CashFromV1Save = 12345.0;
// manually create a save in the previous version to use in the test here.
FString V1SaveFileName = "IntegrationTest_UpgradeSaveGameV1";
// This runs at the start of this command's lifetime in the test. GetWorld(), and
// therefore all the automatic context places it's used, should be valid here
// (unless you try changing the map)
UFUNCTION(BlueprintOverride)
void Before()
{
auto GM = ExampleGameMode::Get();
auto ExampleSaveSystem = UExampleSaveSystem::Get();
ExampleSaveSystem.SelectSaveFile(V1SaveFileName);
// can't change the map in an integration test, so don't do a full map reload. Just deserialize
ExampleSaveSystem.LoadWithoutReload(V1SaveFileName);
}
// runs each tick. Return true to pass the test. The test fails if the timeout
// (default 5 seconds) is hit and this hasn't returned true.
UFUNCTION(BlueprintOverride)
bool Update()
{
auto GM = ExampleGameMode::Get();
// if the gamemode is loaded from the save, and the upgrade code has run
// successfully, the values should match.
if (GM != nullptr && Math::IsNearlyEqual(CashFromV1Save, GM.GetCash()))
{
return true;
}
return false;
}
// The output in the automation test log. Show expected success condition and
// current state for debugging when it fails. Important to check GetWorld() in case
// it runs too early.
UFUNCTION(BlueprintOverride)
FString Describe() const
{
float ActualCash = -1.0;
if (GetWorld() != nullptr)
{
auto GM = ExampleGameMode::Get();
if (GM != nullptr)
{
ActualCash = GM.GetCash();
}
}
return f"Expected cash: {CashFromV1Save}, Actual cash: {ActualCash} (-1 is null)";
}
}
Code Coverage🔗
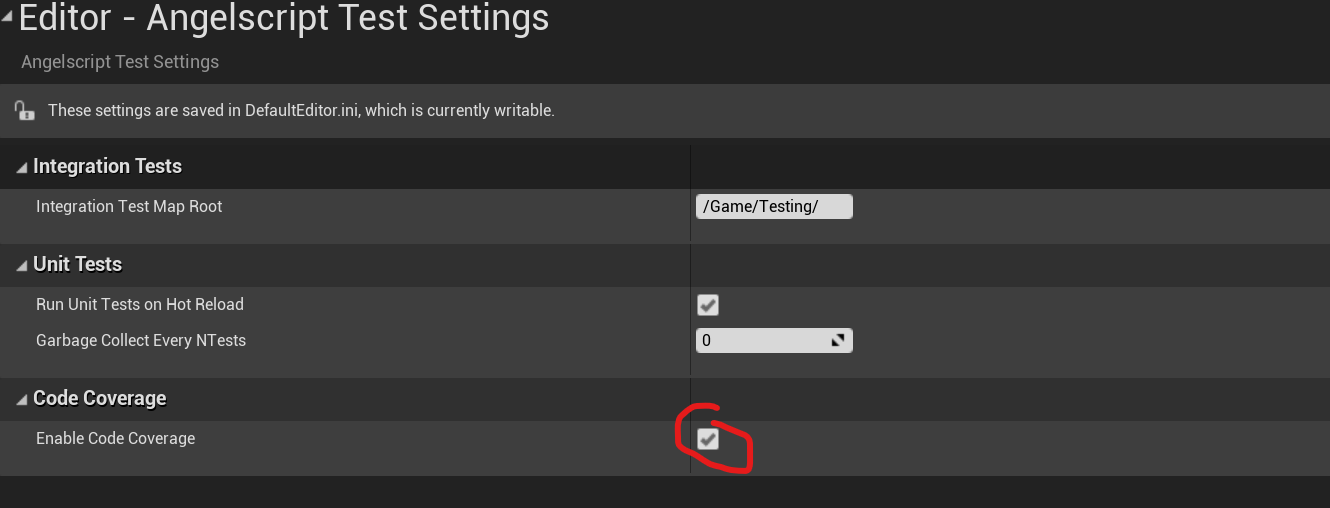
Enable code coverage in Project Settings > Editor > Angelscript Test settings (or pass -as-enable-code-coverage on the command line). Note, code coverage slows down editor startup by ~20 seconds so remember to turn it off later.

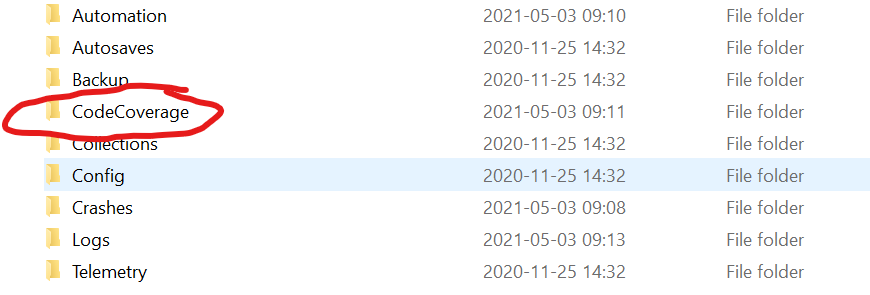
Run some tests as described above. The editor will write a report to Saved/CodeCoverage. Note: it's overwritten each time you start a new test run.

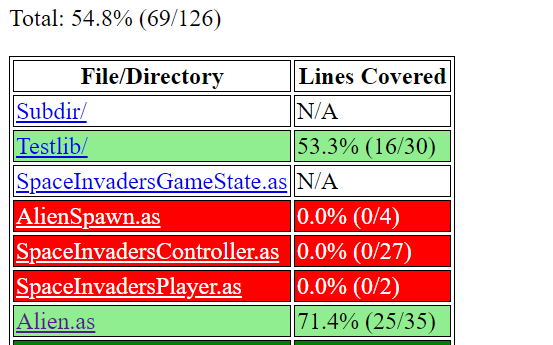
Open index.html to see a summary for all your angelscript.

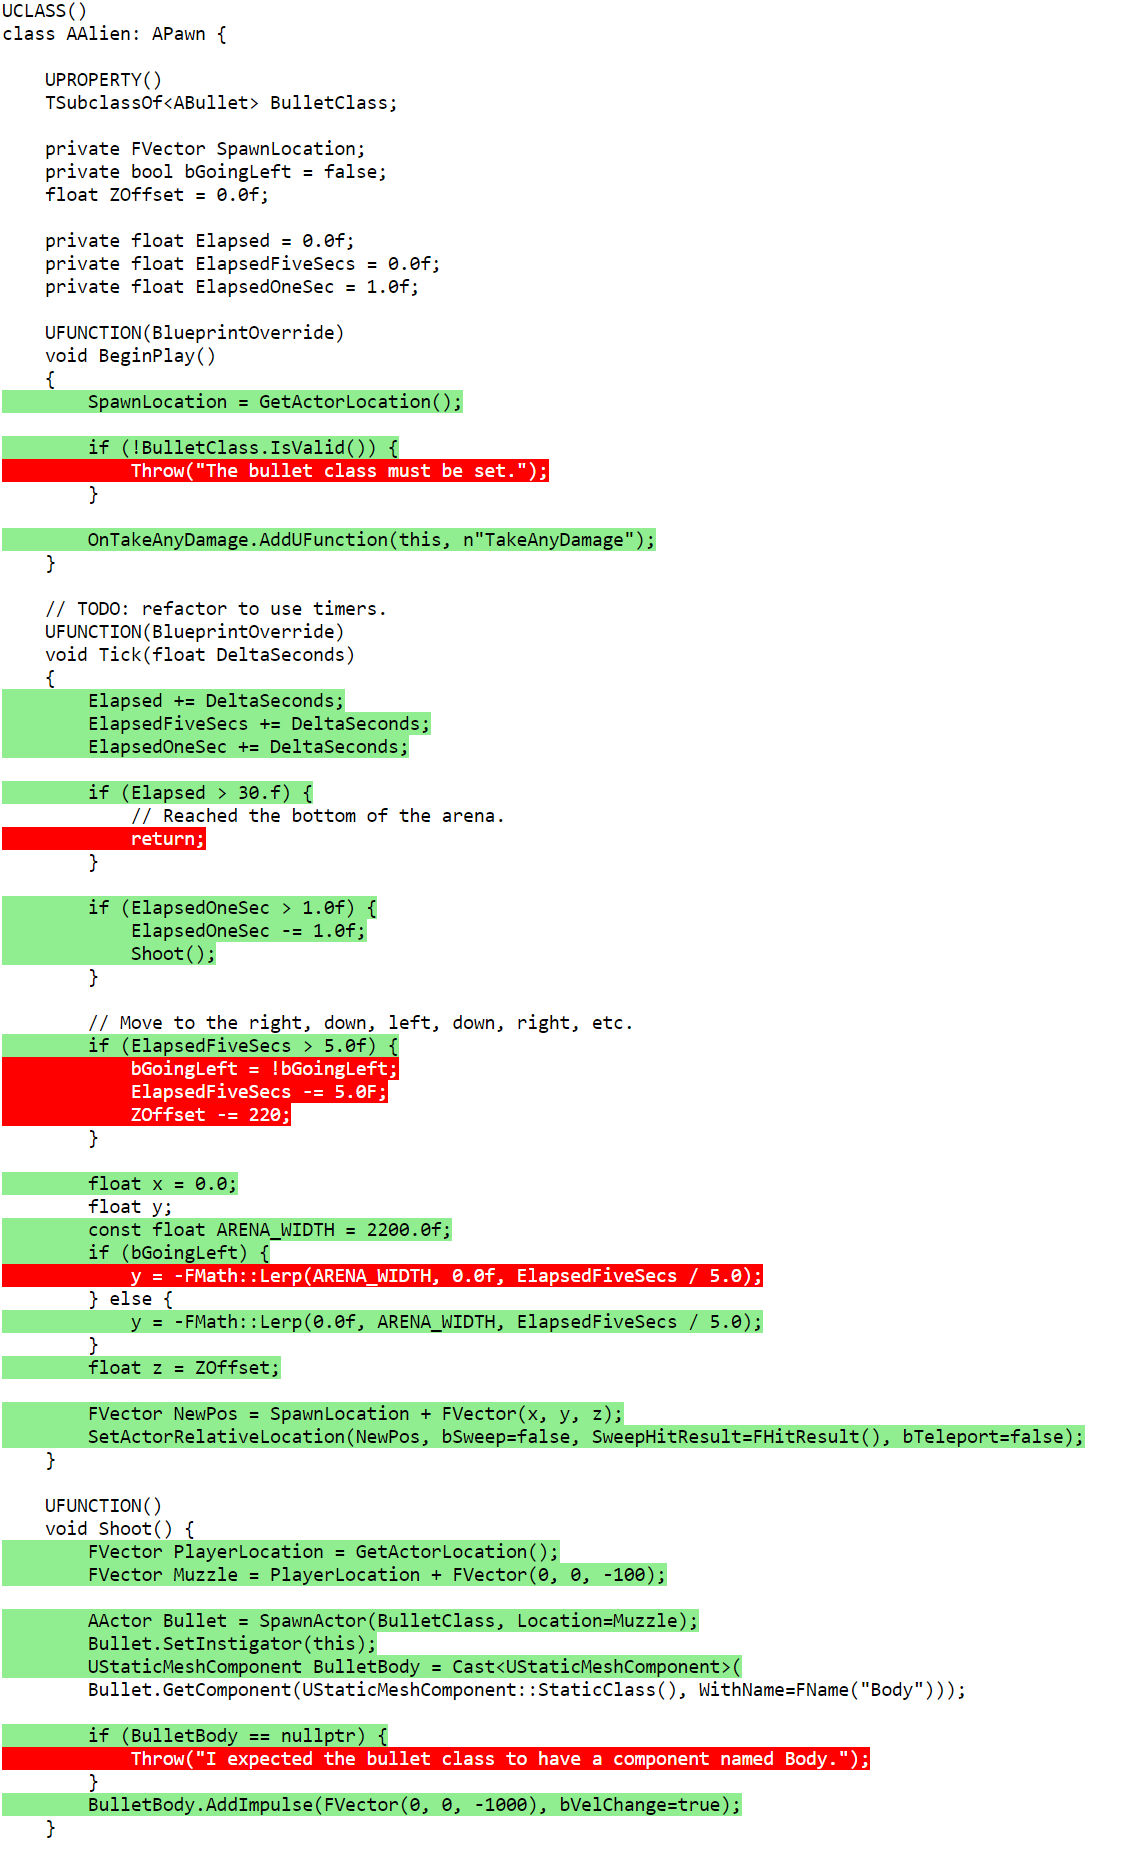
Open individual files to see their line coverage.


